
Aero testing and aero position setup has been a core of my business for the past 6 years and I have seen a 100+ riders (including myself) going from setups with mediocre CdAs all the way to world class, producing many race wins and national TT titles in the process.
Even though the amount of information available on the internet on the topic of aero position seems to be endless, most of it seems to be either not very practical, or in the worse case plain wrong.
More often than not, I come across riders with fundamentally wrong aero position adjustments – to the point where a few patterns started to emerge.
This article is aimed at identifying these common mistakes/misconceptions and will hopefully point you in the right direction when adjusting your position.
If you prefer listening/viewing instead, here is the YouTube version instead.
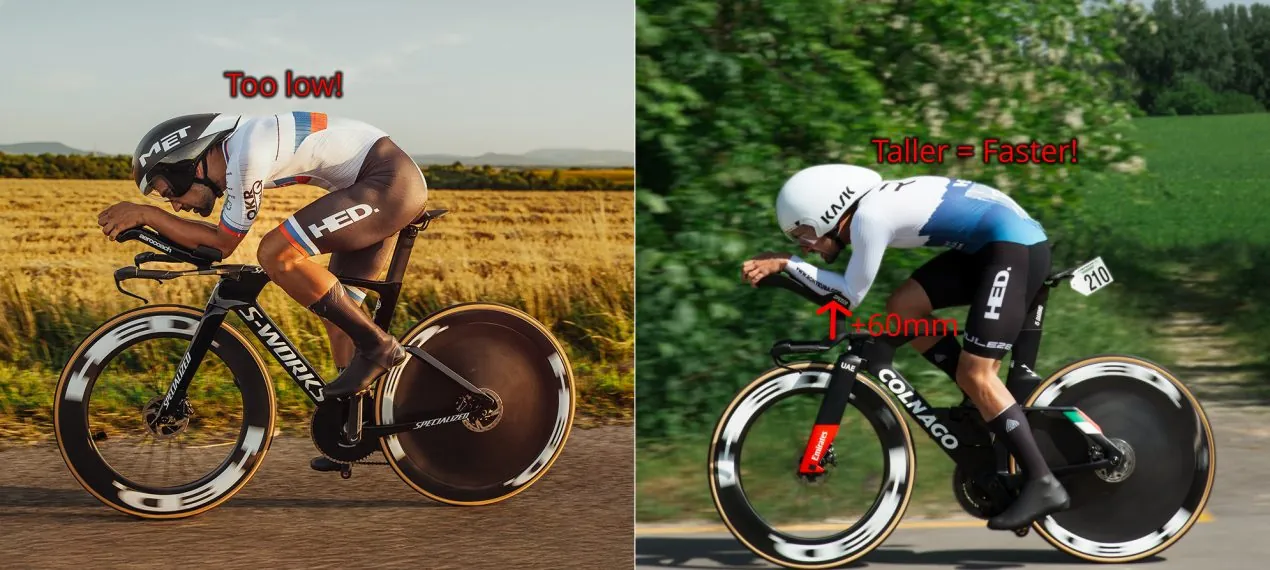
When it comes to stack height, many riders still go with the age-old adage of “lower is faster”.
This is partially true. A low stack height shifts the torso of the rider to a horizontal orientation – which of course allows for the lowest possible frontal area.
Minimizing the frontal area should definitely not be your only consideration though, as the overall shape of your body (Cd*A) will have a much larger impact on the aerodynamic drag you are experiencing.
Having an overly low stack often forces a rider to open up the head position away from the forearms. This means a sizeable aerodynamic penalty, often combined with head movement (to allow for forward visibility).
As a “bonus”, the hip angle also gets closed, limiting the power output in the process.
In our test sessions, we have found great success in (significantly) increasing stack height.
This change allows riders to relax at the shoulders and neck, dropping the head towards the arms. Even though the theoretical frontal area is increased this way, it often reduces the overall CdA in practice due to a more static head and upper body position, with better forward visibility.
With modern aerobars (such as the SYNC AB3), the penalty for adding stack is minimal: ~2W@50km/h for every 10mm.
Increasing stack can yield a higher achievable power output from the rider – as much as 3-5% at threshold – making the taller aero position faster overall.
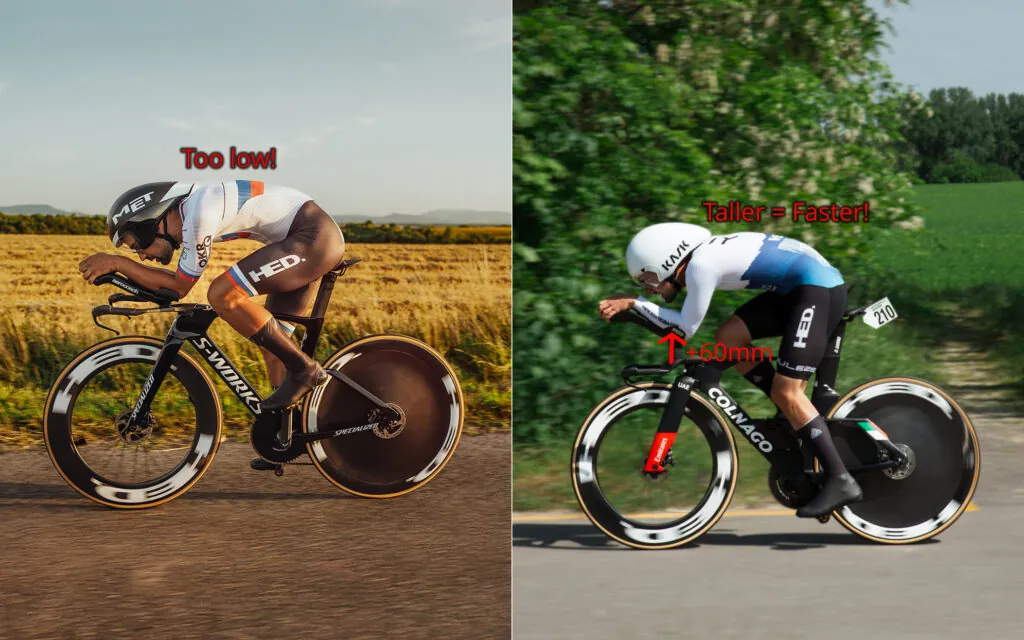
Aerobar reach is possibly the most butchered adjustment ever made. I believe the biggest reason for this is that there is a specific UCI rule in place that limits it. This perhaps sends a subconscious message that somehow there is some magic performance gain lies beyond these limits.
Either way, the opposite seems to be true in practice. Stretching the reach towards, or past the UCI limits almost always lead to an aero penalty and often quite a significant one.
Compact aero positions usually work best. Starting off with your upper arms angled slightly forward is a good baseline.
During our testing, we have found that reach adjustment is a lot less forgiving than stack. The optimal adjustment window tends to be quite narrow and the aero penalty seems to be significant on both sides.
For this reason, it is best to leave this adjustment to controlled aero testing.
Out of all the adjustment metrics, the aerobar angle likely is the one that is easiest to get right.
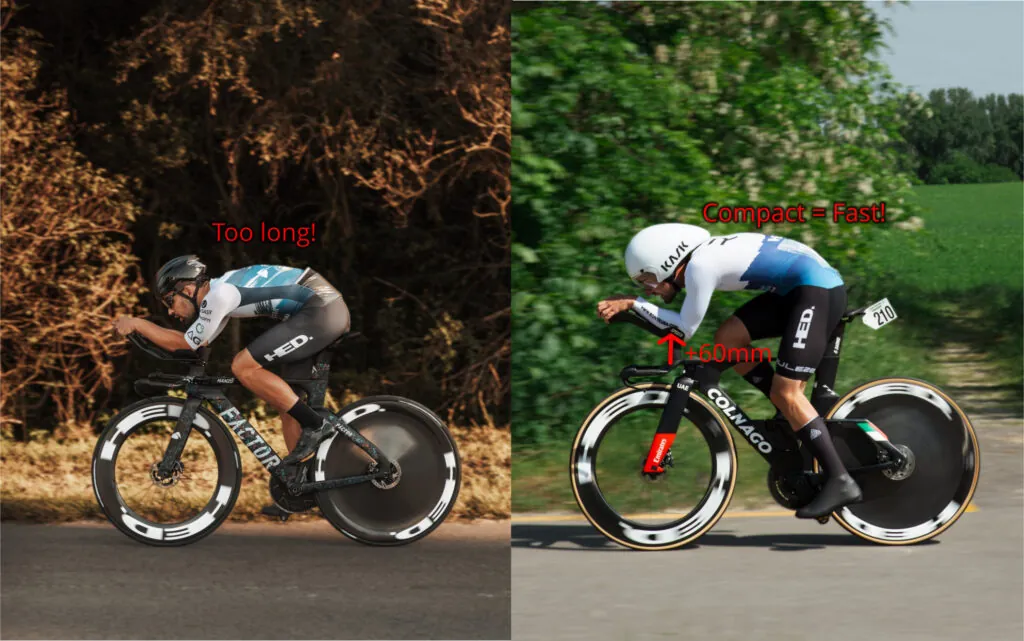
Based on our test data, the sweetspot range is between 20-25 degrees (of upward tilt of course) for most riders. Luckily, this is also the range that is most commonly supported by modern aero bar systems.
Riders using older style poles and bars might find it tricky to achieve a comfortable setup with this type of tilt WHILE adhering to the UCI vertical pole limits, so definitely double check your compliance before key events. Proceed with caution!
Angles that are too flat have a similar effect to that of a low stack – creating too big of a gap between the arms and head.
Bars tilted too far up result in extra shoulder and elbow strain, plus the high hands usually disrupt the airflow around the helmet as well.
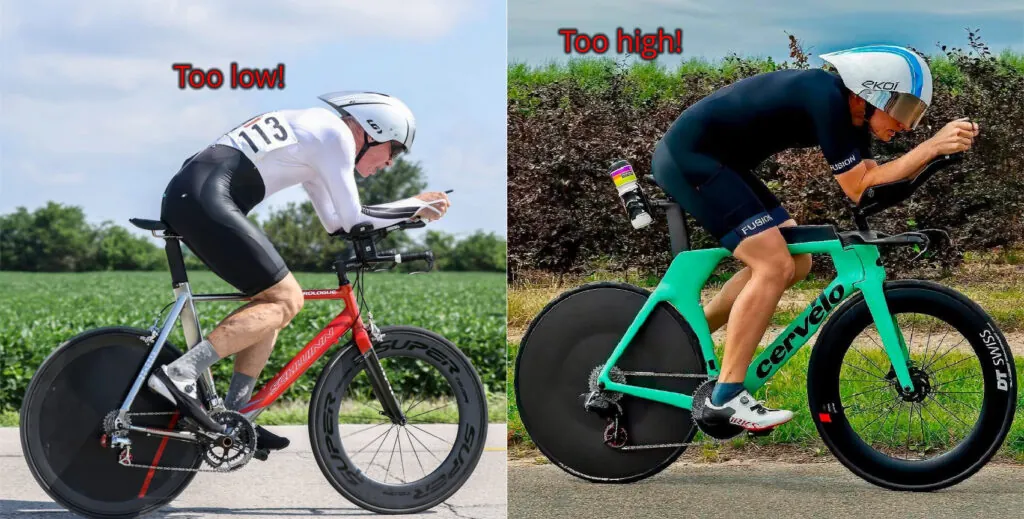
The myth of high saddle positions and their alleged increases in power output are still very much present. Such setups stem both from cycling tradition and from misinformed use of bike fitting technologies.
In the past, excessive saddle height has been used as a means of opening up the hip angle of a rider. Nowadays, we can solve this issue by using shorter crank lengths that are now widely available.
Raising your saddle height too much creates a long list of problems that affect both your riding comfort and performance.
The most obvious performance drawback is a direct increase in frontal area. Pair that with pelvic instability and rocking under load and you have the perfect recipe for a high CdA. (The saddle pressure and discomfort won´t be too pleasant either.)
Without professional oversight, it might be difficult to get this into the right ballpark, but you can use the following pointers to start off:
Disclaimer – saddle height is a complex topic and there is a lot of interaction with other fit parameters that can influence your final setup. If you want to be sure, book a fitting session here.

Sitting one post code in front of your actual saddle is a modern day fitting epidemic that I can´t quite wrap my head around.
Of course, the idea behind it is opening up the hip angle. There are much more elegant solutions to this problem though, that don´t cause as many implications to the rest of the aero position.
Biomechanical issues caused by insufficient saddle setback:
Technical issues caused by insufficient saddle setback:
My recommendation here is to start out with a reasonable amount of setback (40-60mm) and tune the pelvic function by proper crank length, saddle height (and type) + correct Q-Factor and cleat position.
This method ensures that you are operating in the correct operating range of your bicycle (aerodynamics, handling, weight distribution and structural integrity).
Having a biomechanically correct aero position is the only way to secure a stable platform for your subsequent aerodynamic optimizations.
Not only does it improve your baseline CdA, but it also makes for a more efficient platform when performing velodrome or outdoor aero testing (more stability = lower error rates).
Additionally, having a good baseline also makes it possible to streamline the whole process using CFD simulations via the AiRO app.
4 Responses
Brilliant summary. Thank you
Cheers!
Good summary. All of those examples make sense. I started to think that most propably I have too low / too long position 🙁
Thank you!
It is quite a common mistake, so it might as well be! If you want to be sure, we can verify that via CFD simulations and/or aero testing.